What is a Trickle Charger
Usually the term “trickle charger” can be used for indicating different devices:
- A battery maintainer sends a small amount of current within a certain time period. It’s mostly used to keep the battery full over a long period and prevent the self-discharge. These appliances can be left connected and working for a long time.
- A regular charger sends the constant high current to the battery in order to replenish it quickly. Such understanding of a trickle charger is often used on the Internet, dedicated forums, etc. Such chargers cannot be used as maintainers and are often used to revive a dead battery or perform a quick powerup to crank an engine.
For the purpose of this article, I’ll use the first notion. After all, the very name “trickle” means that the current surge is slow, drop-like. These devices work well keeping your battery ready-to-use during winter or an idling period. Unlike the regular fast chargers, they don’t harm the battery chemistry and thus prolong its service life. Besides, the majority of battery types develop non-returnable changes upon full discharge. The power block might get a charge too fast, with subsequent equally fast discharge, work non-consistently showing different voltage indications, or even not accept the charge.
The trickle chargers differ by many parameters. Some of them are crucial before going deep into information on how to use a trickle charger and ensure safe charging of your power block. Others make up for user comfort mainly.
- Smart vs. non-smart. Smart trickle chargers provide a lot of convenient and safe options. They’re equipped with specific sensors that monitor the battery level and its changes, and select the optimal type of charge. These chargers are often the multi-stage ones and can perform other functions apart from trickle charging, e.g. breaking the sulfates on the battery posts. The non-smart chargers require a constant user’s attention since they don’t track the battery state and don’t shut off automatically. Still, these chargers cost much less than their “smart” counterparts.
- Capacity and voltage. The trickle chargers vary as much as the battery types. They can supply the 1A current or 10A and have different voltages (from 3V to 14V). The optimal way to find out which charger you need is to compare the battery parameters with the charger ones and follow the manual instructions.
- Additional options. The trickle charger can also feature other connections to replenish several devices. This can be an additional pair of cables with clamps, a USB port, or a regular power outlet. Some of the chargers can be powered by both built-in batteries and mains supply.
How to Connect a Trickle Charger to a Car Battery
- Determine the battery position during charging. If your car is standing for a few weeks in a garage, it might be non-convenient to take out and then install the battery. Still, it’s recommended for the prolonged trickle charging that can last a month or more. If you’re going to trickle charge a stand-alone battery, make sure there’s enough space and ventilation in the area. Make sure you have a cord reaching the charger without being tensioned.
- Set the vehicle in the optimal position. If you’re going to trickle charge your battery while within the car, consider if you might like to move it afterward. When the charger is connected, any movement would be impossible other than disconnecting the charger and then hooking it up again.
- Take off the car leads from the battery. In this way, your electric system will be safer. However, this will cause the onboard ECU to reload. Make sure you have all the codes / access appliances in order to access the ECU functionality once the leads are back on the battery.
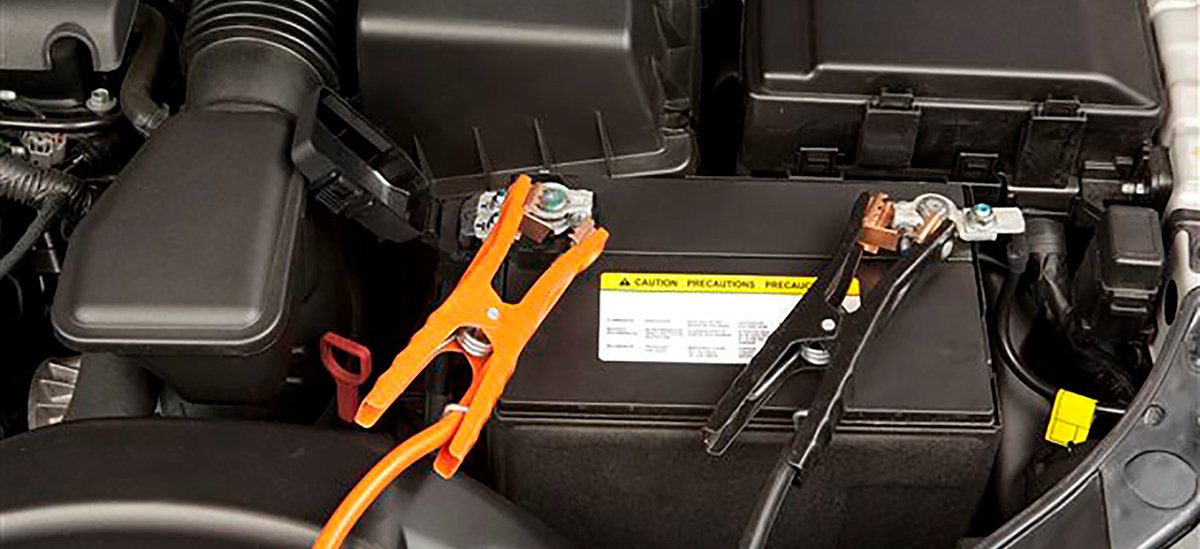
- After all the precautions are performed, you can delve into how to hook up a trickle charger. First, ground the power appliance. For this, attach the relevant clamp to a solid metal part of the car (e.g. a car frame). Make sure it doesn’t touch the battery and cannot slide away. Remember that the charger should be set to the “Off” position
- Put the charger leads onto the battery. Connect the positive lead with a clamp or a ring terminal to the battery’s positive post. Then, perform the same operation with the negative lead hooking it up to the negative post on the power block.
- Check the charging parameters, if this function is available on the charger you’re using. Make sure the voltage doesn’t exceed the battery nominal one.
- Connect the charger to the wall outlet or another power source. Turn it into the “On” position. Check that the system is stable, there are no sparks, progressive heat, gurgling sound, etc. If the charger has several operation modes, ensure it sends a trickle charge and monitors the battery charge correctly
- Keep watching the charger once for a while. If it doesn’t have the automatic shutoff function, you’ll have to test the battery level with the voltmeter for a week or two to make sure the charger doesn’t overflow the battery. With the smart charger, watch the system for reaching the “maintaining” stage and keeping going this way.

My name is Brandon, and I’ve been interested in cars since I was a kid. I got a bachelor’s degree in Automotive Technology and worked in a private car workshop. I have two cars that have been completely upgraded with my own hands. So I successfully put all my knowledge into practice.