Every car owner who is interested in the car repairing process should have a multimeter. This multifunctional device is capable of performing many useful functions. If you do not have one, then you can choose the best multimeter for automotive use right now.
In the following blog post, we will tell you how to test a crank sensor with a multimeter and what are the symptoms of a bad crankshaft position sensor.
Signs of Crankshaft Position Sensor Failure
Before understanding how to test a 3 wire crankshaft position sensor, you should be aware of the signs of this car part’s malfunction.
These sensors come in various shapes and sizes, but the symptoms of failure are the same for all. The signs of a faulty crankshaft sensor include:
- Some car models have a dashboard warning light that illuminates if there is a problem with this appliance.
- A reduction in the car’s dynamic characteristics is noticeable (this sign may indicate other breakdowns, but it is definitely worth checking the sensor).
- When the car is moving, the engine speed changes arbitrarily, even at the same speeds and gears.
- Detonation in the engine at high dynamic loads is present.
- If the sensor fails completely, you simply won’t be able to start the engine.
How To Test 3 Wire Crank Sensor With Multimeter
Testing a camshaft position sensor with a multimeter is the easiest way to perform a check. However, you do not get a 100% guarantee that this method of checking will detect a malfunction. In order to get the fairest result, you can follow this step-by-step action plan.
Checking the power supply is carried out as follows.
- To begin, you should raise your car with a jack for better convenience.
- After that, the fuel and ignition systems must be turned off. The crank sensor is intended to synchronize the operation of these two systems; to do so, two fuses must be removed: fuel and ignition.
- Use a multimeter to ensure that the wiring is properly grounded. Simply connect the red lead of your multimeter to C-wire.
- To check the crankshaft position sensor, connect the black probe to the negative (-) battery terminal.
- Then, turn the key to the position that supplies power to all electrical systems. It is not necessary to start the car.
- Set the multimeter to the appropriate current. If you have an automatic multimeter, you can simply use it to measure DC voltage. If not, you also need to select the desired measurement range.
- Turn the engine ratchet by hand.
- After that, the multimeter will register a voltage signal.
- If you get the result: ON/OFF, then the power is on, and everything is working properly; if not, you should do additional checking.
Now let’s figure out how to test a 3 wire crankshaft position sensor for other breakdowns. If the power check reveals no problems, then you can proceed to the next step right away:
- Connect the red wire of the multimeter to the reference wire of the sensor. The black one should be connected to the ground wire. You should get a value of 5, 7, or 12 volts. If so, the reference wires and ground wires are fine.
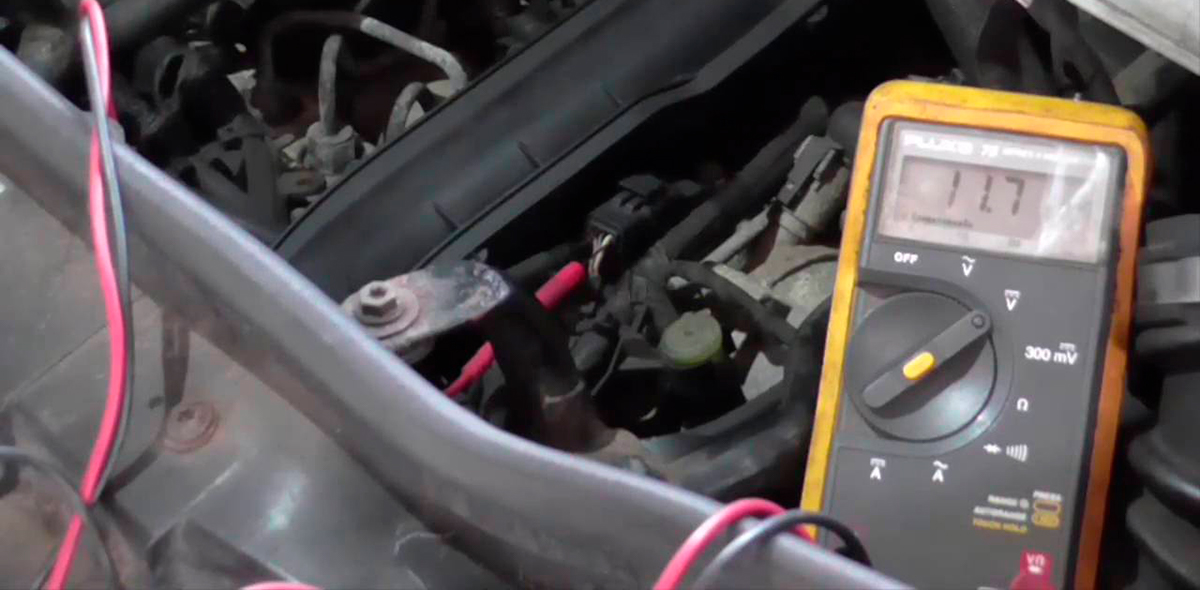
- After that, you need to start the engine and check the millivolts. To do this, connect the red wire of the multimeter with the probe to the sensor’s signal wire and the black wire to the battery ground. If the value is below 300 millivolts, you should replace it.
So, now you are aware of how to test crank sensor 3 wire with a multimeter.

My name is Brandon, and I’ve been interested in cars since I was a kid. I got a bachelor’s degree in Automotive Technology and worked in a private car workshop. I have two cars that have been completely upgraded with my own hands. So I successfully put all my knowledge into practice.